How to Choose Pegboard Displays for Your Business?

Time:2026-10-20 Author:Ethan
0%

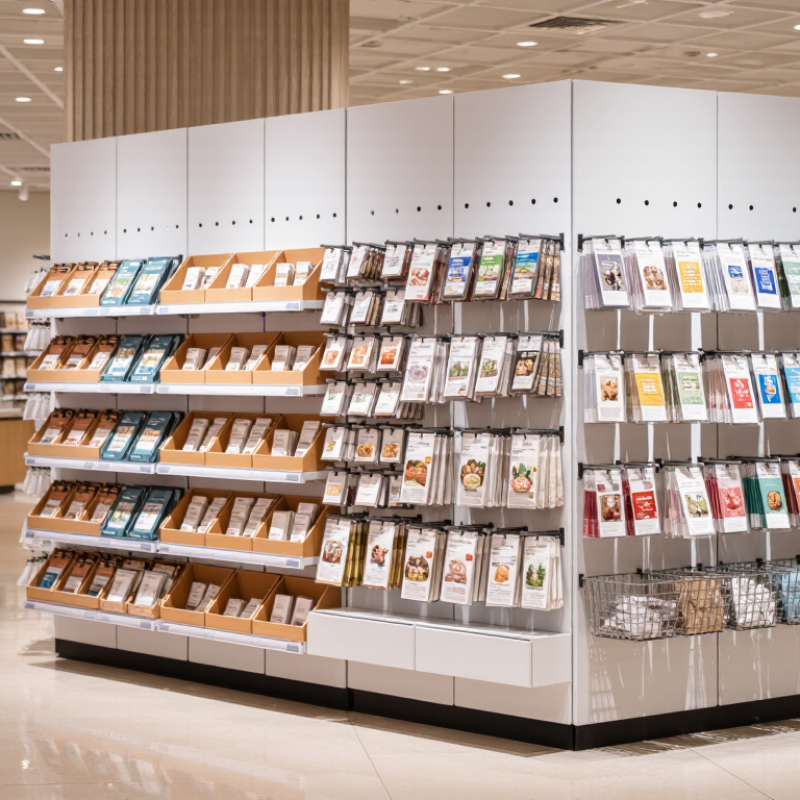
Choosing the right Pegboard Displays can change how shoppers notice, handle, and remember your products. A well-planned board turns unused wall space into a clear selling zone. Hooks, shelves, baskets, and label strips should work together. Otherwise, the display may look busy instead of useful.

Industry research supports this practical approach. Grand View Research’s Retail Shelving Market Analysis identifies modular design, space efficiency, and flexible product arrangements as important retail fixture trends. These factors matter because stores frequently change products, promotions, and seasonal layouts. The Visual Merchandising Institute also emphasizes sightlines, product grouping, and customer movement when planning in-store displays. A pegboard placed beside a checkout counter needs different spacing from one installed in a hardware aisle.

Small details influence real performance. A hook that sits too low can hide packaging. A weak panel may bend under heavier merchandise. Poor spacing can make a popular item difficult to remove. Retail teams should check load capacity, material quality, finish, installation method, and cleaning requirements before purchasing. These points sound basic. They are often missed.

This guide explains how to compare Pegboard Displays for different business needs. It considers store size, product weight, customer access, branding, and future layout changes. There is no universal solution. A stylish display can still fail if it slows restocking or creates visual clutter. Test one section first, observe customer behavior, and adjust the design before expanding. That reflective step may reveal more than a catalog promise.
How to Choose Pegboard Displays for Your Business?

Define Pegboard Goals Around POPAI’s 76% In-Store Purchase Decisions

How to Choose Pegboard Displays for Your Business?

POPAI research reports that 76% of purchase decisions happen in stores. This figure should shape your pegboard display goals. A display is not only storage. It guides attention, comparison, and action near the buying moment.

Start with one measurable purpose. You may want faster product discovery, stronger visibility, or easier restocking. Place popular items near eye level, with clear spacing between product groups. Use hooks for hanging packages and small shelves for boxed products. Leave enough room for shoppers to remove one item without disturbing others. A crowded board may hold more stock, but it often creates hesitation. That trade-off deserves careful testing.

Tips: Measure conversion before and after installation. Track which hooks empty first, where shoppers pause, and which products remain untouched. Test two layouts for seven days. Adjust hook height, product quantity, and sign placement. Keep the stronger version, even if it looks less attractive. Visual appeal can mislead.

Choose durable panels, secure fittings, and a finish suited to your store’s traffic. Check the display during busy hours, not only when it looks perfect. Staff should restock it quickly and safely. A pegboard that needs constant correction may not support the 76% in-store decision opportunity. I would also question the statistic’s exact context, because customer behavior changes by category, season, and location. Use it as a planning signal, then verify it with your own sales data.

Match Panel Materials, Hooks, and Load Ratings to Product Weight

How to Choose Pegboard Displays for Your Business?

Choosing a pegboard display starts with the product, not the panel’s appearance. In retail installations, I weigh every item, including packaging and customer handling. A ceramic mug needs different support from a boxed power tool. That difference matters. Record the heaviest unit, then add a practical safety margin. Do not rely on advertised weight alone. Some products shift forward when hooks flex, creating extra leverage. This is where attractive displays can fail.

Panel material controls stiffness, durability, and moisture resistance. Powder-coated steel suits heavier goods and busy aisles, while laminated wood works well for lighter packaged items. High-density plastic can help in damp areas, but its fixing points need close inspection. Check panel thickness, hole spacing, and attachment points. A strong hook cannot rescue a weak backing board. I learned that after a loaded panel began bowing between supports. It held, but it looked unsafe.

Choose hooks with a stated load rating, then compare it with the real load at the hook tip. A twelve-kilogram rating may assume a short hook and balanced placement. A longer arm can reduce practical capacity. Use retaining features for items customers frequently touch. Spread heavy products across several uprights instead of clustering them together. Inspect screws, slots, and hook movement regularly. Ratings are useful, not magical. When information is missing, test a sample gradually and document the result before filling the display.

How to Choose Pegboard Displays for Your Business?

Match panel materials, hooks, and load ratings to the weight of the products you plan to display.

The chart uses practical retail reference weights and recommended minimum hook ratings for common product categories. Light accessories are generally suitable for plastic panels, packaged cosmetics and boxed hardware work well with MDF or reinforced panels, while heavier hand tools are better matched with metal pegboards. Always confirm the manufacturer’s rated capacity, account for dynamic loads, and distribute weight across multiple hooks.

Plan ADA-Compliant Layouts Within the 15–48-Inch Reach Range

How to Choose Pegboard Displays for Your Business?

A compliant pegboard layout starts with reach, not decoration. The 2010 ADA Standards set a 15-inch minimum and 48-inch maximum for accessible forward and side reach. Keep frequently handled products, price labels, and controls within this zone. A shopper should not need to stretch, bend deeply, or ask for assistance.

The World Health Organization’s Global Report on Health Equity for Persons with Disabilities estimates that 1.3 billion people experience significant disability worldwide. In the United States, the 2022 American Community Survey reported disability among 13.4% of the civilian noninstitutionalized population. These figures make accessible merchandising a practical business decision, not a narrow compliance exercise. Use lower hooks for small packaged goods and place heavier items between waist and chest height. Leave clear floor space in front of the display, so a wheelchair can approach and turn without striking nearby fixtures.

Measure the finished installation.

In practice, teams often measure the pegboard panel but forget product height. That mistake can push a shelf above 48 inches after restocking. Create a simple elevation drawing, mark the 15–48-inch reach band, and review it during installation. Local requirements may differ, and ADA reach limits do not solve every access issue. Test the layout with real users when possible; a technically acceptable display may still feel awkward, crowded, or difficult to read.

How to Choose Pegboard Displays for Your Business? — Plan ADA-Compliant Layouts Within the 15–48-Inch Reach Range

Planning table for pegboard display heights, shelf positions, hardware selection, and accessible merchandise placement

Display Element Recommended Position Reach Classification Planning Status Selection and Layout Guidance
Frequently purchased products 15–48 in. above finished floor Within the primary accessible reach zone Preferred Place everyday, popular, or essential merchandise in this zone so customers can view and retrieve it without excessive reaching.
Lowest merchandise hook or shelf At least 15 in. above finished floor Minimum forward and side reach reference Reference Avoid placing key merchandise below 15 in. where possible. Consider customer stability, visibility, cleaning access, and the risk of products being difficult to retrieve.
Highest frequently accessed hook or shelf No higher than 48 in. above finished floor Maximum unobstructed forward and side reach reference Preferred Use this upper limit for merchandise that customers are expected to select independently. Measure to the actual product or operable part, not only to the pegboard panel.
Top display header or visual sign Above the 48-in. merchandise zone Visual information rather than customer-operated reach Use Carefully Keep signs and decorative elements above the accessible merchandise area when they do not require customer operation. Maintain clear sightlines and avoid projecting hazards.
Obstructed forward-reach location Plan around the depth of the obstruction ADA reach limits can change when an obstruction is present Verify For an obstruction up to 20 in. deep, the maximum forward reach is generally 48 in.; for an obstruction more than 20 in. and up to 25 in. deep, the maximum is generally 44 in. Confirm the exact condition before installation.
Obstructed side-reach location Keep the product within the accessible side-reach envelope Side reach may be limited by the panel, shelf, or adjacent fixture Verify For an obstruction up to 10 in. deep, the maximum side reach is generally 46 in. where the clear floor or ground space is at least 30 in. wide. Avoid deep bins and projecting shelves in the reach path.
Adjustable peg hooks Set product positions between 15 and 48 in. Flexible accessible merchandising hardware Recommended Choose secure hooks with locking or retention features when products may slide off. Adjustable hardware makes seasonal remerchandising easier without moving the entire panel.
Shallow shelves or baskets 15–48 in. with front edges kept clear Accessible when depth and projection are controlled Recommended Use shallow storage for small products and keep the front lip easy to grasp. Avoid deep containers that force customers to reach over merchandise or fixtures.
Heavy or awkward merchandise Approximately 15–36 in. above finished floor Within the accessible reach range with reduced lifting height Preferred Place heavier items lower in the accessible zone to reduce lifting strain. Confirm that the pegboard, brackets, hooks, and wall anchoring are rated for the combined load.
Clear floor space in front of display Provide an unobstructed customer approach Required for practical access and maneuvering Reference Do not block the approach with cartons, promotional stands, or queue equipment. Coordinate the display with the applicable accessible route and turning-space requirements.
Reachable price labels and product information Align with the related merchandise within 15–48 in. Information should be easy to see and understand Recommended Position labels consistently beside or below products. Use strong contrast, readable type, and uncluttered spacing so customers can identify prices without moving merchandise.
Merchandise above 48 in. Use only for nonessential or staff-assisted products Outside the primary unobstructed reach zone Limit Use Reserve higher locations for lightweight displays, overstock, or visual merchandising. Provide an equivalent accessible selection within the 15–48-in. zone when independent customer access is expected.

Planning note: The 15–48-inch dimensions are based on common ADA Standards reach-range references for unobstructed forward and side reach. Fixture conditions, local building codes, product weight, accessibility requirements, and the type of business may require additional review by a qualified accessibility professional.

Compare Modular Pegboard Costs, Durability, and Reconfiguration Speed

Choosing a pegboard display starts with the work it must perform, not its appearance. In a busy shop, staff may move hooks, shelves, and bins several times each week. Modular systems usually cost more at purchase than fixed panels. However, reusable parts can reduce replacement spending during seasonal changes. Compare the full cost, including brackets, delivery, installation, and spare fittings. A low quote can become expensive when every layout change needs new hardware.

Durability depends on material, board thickness, mounting method, and daily load. Steel panels resist impacts and repeated adjustments, while engineered wood can offer a warmer, lighter presentation. Check the stated load rating and test one loaded section before ordering in volume. Inspect hole edges, shelf joints, and wall anchors. These details reveal weakness earlier than a sales description. Moisture and cleaning chemicals can also shorten service life. I learned this the hard way. A display may look solid, yet loosen after constant handling.

Reconfiguration speed is a practical labor cost. A well-designed system lets one trained employee change a small bay in minutes without drilling. Count the steps: remove stock, release fittings, reposition accessories, and restore pricing. If tools are required, record that delay across a year. Faster is not always better. Loose hooks can shift, and rushed changes may create uneven spacing or unstable shelves. Ask for a sample unit, time a real change, and document the result. That evidence supports a more reliable purchase decision.

Test Product Visibility, Shopper Flow, and Display Performance Metrics

How to Choose Pegboard Displays for Your Business?

Test Product Visibility, Shopper Flow, and Display Performance Metrics

A pegboard display should make products easy to notice, reach, and compare. POPAI’s Mass Merchant Shopper Engagement Study reported that 76% of purchase decisions happen inside stores. That figure makes visibility a measurable business issue, not a decoration choice. Track shopper stops, product touches, and the distance between entry points and display zones. A small aisle camera or manual observation sheet can reveal awkward placement quickly.

Test shopper flow before purchasing a large fixture. Mark three zones with tape: approach, interaction, and exit. Record how many shoppers enter each zone, how long they stay, and whether they pick up an item. Retail studies often separate exposure from engagement, and your pegboard should do both. Keep best-selling products between waist and eye level. Place slower items nearby, but avoid visual clutter. Too many hooks create friction.

Measure performance weekly. Compare units sold, conversion rate, average transaction value, and out-of-stock frequency before and after installation. The U.S. Census Bureau’s Monthly Retail Trade Survey shows that retail performance shifts across channels and seasons, so one week can mislead you. Use several comparable weeks instead. That is less exciting, but more reliable. In practice, I would also test spacing, signage size, and hook height separately. Changing everything at once hides the real cause. A slightly uneven result may teach you more than a perfect-looking display.

FAQS

What should a pegboard display achieve in a store?

Choose one measurable goal, such as faster product discovery or easier restocking. Storage alone is not enough.

Where should popular products be placed?

Keep them between waist and eye level. Shoppers usually notice this area quickly.

Which accessories fit different product types?

Use hooks for hanging packages and small shelves for boxed products. Match the fixture to the product shape.

How can a pegboard reduce shopper hesitation?

Leave space between product groups. Shoppers should remove one item without disturbing nearby products.

How can store teams test display performance?

Compare two layouts for seven days. Track product touches, shopper stops, units sold, and empty hooks.

What should retailers measure before and after installation?

Compare conversion, average transaction value, and out-of-stock frequency. Use several comparable weeks, not just one.

How should shopper movement be studied?

Mark approach, interaction, and exit zones with floor tape. Record visits, stopping time, and product pickups.

What mistakes can weaken a pegboard display?

Crowded hooks, unclear signs, and poor placement create friction. More stock does not always produce more sales.

How often should the display be checked?

Check it during busy hours, not only when it looks perfect. Staff should restock it quickly and safely.

Is an attractive layout always the best layout?

Not necessarily. A less attractive version may sell more. I would question visual appeal until sales data supports it.

Conclusion

Choosing Pegboard Displays starts with a clear understanding of your in-store goals, including how the display can influence purchase decisions, attract attention, and support effective product presentation. Select panel materials, hooks, shelves, and load ratings according to product size and weight, while considering durability, safety, and long-term maintenance. A well-planned system should also make merchandise easy to reach and view, with layouts designed around the recommended 15–48-inch customer reach range to support accessibility.

When comparing options, evaluate total cost, durability, installation requirements, and how quickly the display can be reconfigured for changing products or promotions. Before making a final decision, test the display in a real or simulated store environment. Observe shopper movement, product visibility, interaction rates, and sales performance to determine whether the setup improves customer flow and merchandising results. The best solution balances flexibility, accessibility, appearance, and measurable business value.

Ethan

Ethan

Ethan is a seasoned marketing professional with a deep expertise in our company's innovative product line. With a passion for sharing knowledge and insights, he takes the lead in regularly updating our corporate blog, where he explores industry trends, product features, and effective marketing......